Setting up a VOIP Armor tunnel consists of the following steps:
- Setting up the tunnel between client and server
- Setting up the client’s manual network route to direct the correct traffic through the tunnel
- Setting up the server’s manual network route
- Setting the server’s “flow-pinning” to False
- Setting the server’s “Alternative external IP addresses per interface”
NOTE: If you are subscribed to the BBS service provided by Mushroom Networks, then all of the Server-side configurations (steps 3-5) are performed by Mushroom Networks prior to delivery of your device.
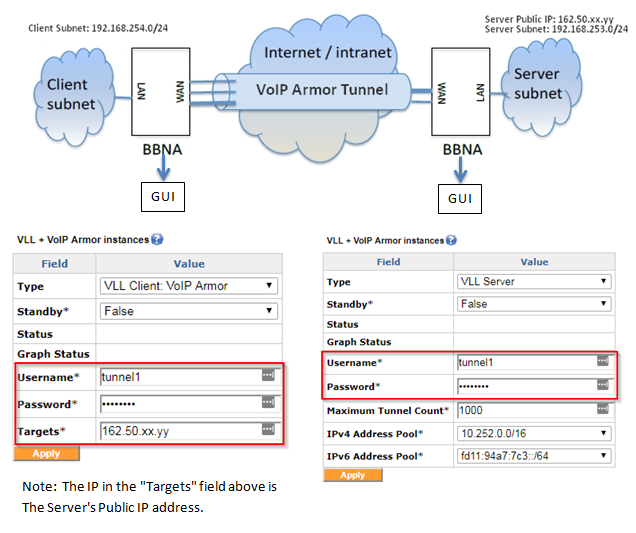
Step 1: Setup the tunnel between client and server
(VLL tab -> click “Add” next to “VLL + VoIP Armor Instance”)
A typical setup is detailed below, showing user-required input in the red boxes. Note that all other fields should be left at default values.
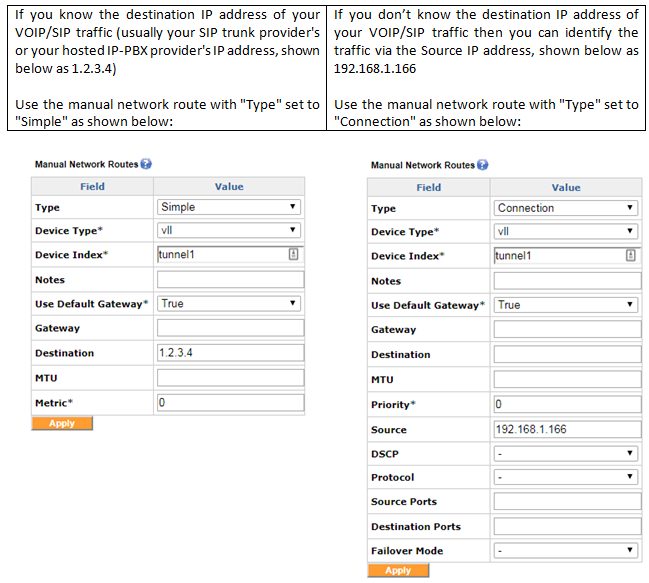
Step 2: Setup the Client’s manual network routes to direct VOIP traffic into the tunnel
(Advanced tab -> click “Add” next to “Manual Network Routes”)

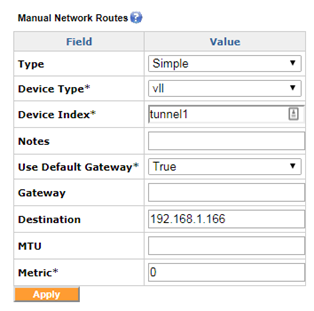
Step 3: Setup the Server’s manual network routes to direct VOIP traffic into the tunnel
(Advanced tab -> click “Add” next to “Manual Network Routes”)
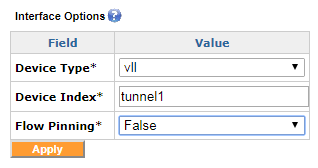
Step 4: Set the Server’s “Flow Pinning” to False
(Advanced tab -> click “Add” next to “Interface Options”)
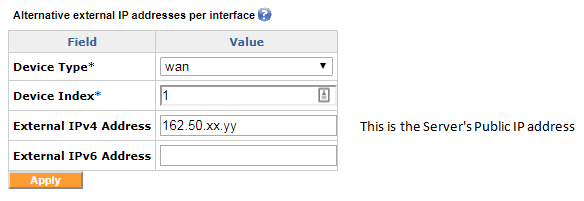
Step 5: Set the Server’s “Alternative external IP addresses per interface”
(VLL tab -> click “Add” next to “Alternative external IP addresses per interface”)